
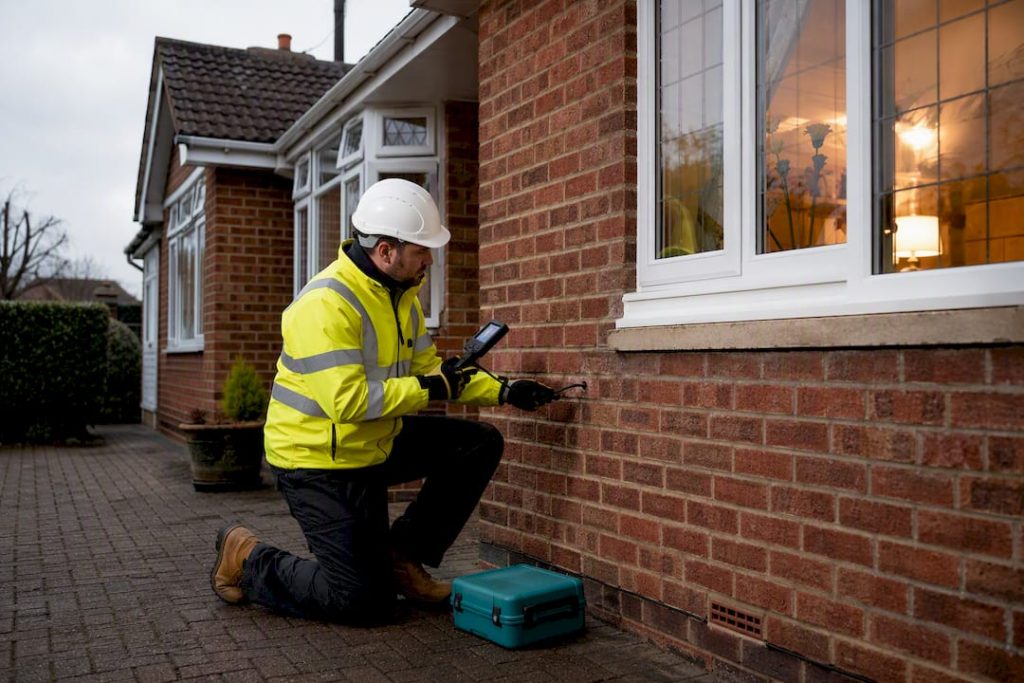
Reinstalling cavity insulation is only appropriate once an independent inspection confirms the cavity is suitable, external defects have been repaired, and the wall has fully dried out. If damp, mould, or cold spots have you weighing up a reinstall, your immediate next step is not to book a refill but to commission an evidence-led survey, using a borescope and moisture profiling, so any decision to extract, dry, or refill rests on what the cavity actually shows rather than what the symptoms suggest.
TL;DR:
- A cavity insulation reinstall should only occur after confirming the cavity is dry, structurally sound, and free of debris through independent evidence-led inspections.
- Common failure causes include driven rain, bridging insulation, poor original installation, and pre-existing damp, all requiring thorough diagnosis before refilling.
- Proper repairs such as fixing gutters, mortar joints, and wall ties must precede any cavity refill to prevent quick recurrence of issues.
- Only materials suitable for the exposure zone and cavity condition, like polystyrene beads, mineral wool, or bonded foam, should be used, with installation strictly following cavity suitability guidelines.
- Vetting experienced, independent contractors with proper accreditation and ensuring work is followed by clearance certificates and reinspection helps guarantee a successful and lasting reinstalment.
Table of Contents
- When should you consider reinstalling cavity insulation?
- What must an evidence-led survey actually check?
- What remedial works come before any reinstall?
- Which materials suit a reinstall, and when
- How do you choose a contractor for the reinstall?
- How do you know the reinstall was done correctly?
- OSCAR Onsite’s practical perspective on reinstalls
- How OSCAR Onsite can help you get this right
- Where to check official guidance
- Sources
- FAQ
When should you consider reinstalling cavity insulation?
Cold spots, rising heating bills, and patches of damp that appear or worsen after cavity wall insulation was fitted are the usual triggers for homeowners to start asking questions. None of these symptoms confirms that the insulation itself is the cause, but together they justify a proper look at what’s inside the cavity.
Several failure patterns turn up repeatedly in inspections:
- Driven rain penetration — exposed elevations, particularly on coastal or upland properties, can push moisture through the outer leaf and into the fill.
- Bridging — insulation material touching both wall leaves, or debris left in the cavity, gives moisture a direct path across to the inner wall.
- Incorrect original installation — wrong material for the exposure zone, uneven fill, or poor hole sealing at the time of install.
- Degraded fill — some fibrous and bead products settle, slump, or lose performance over decades.
- Insulation trapping pre-existing damp — occasionally the cavity was already compromised before the fill went in.
Before assuming the insulation is guilty, rule out plumbing leaks, rising damp, and condensation from poor ventilation. A survey guide on cavity wall insulation causing condensation is a useful place to start separating those causes from genuine cavity failure.
What must an evidence-led survey actually check?
A reliable survey does not stop at a visual look from the garden. It follows a defined sequence and produces evidence you can act on, not just an opinion.
- Borescope cavity inspection — a fine camera inserted through small drilled holes to examine the fill’s condition, distribution, and any debris or bridging.
- Moisture profiling of both the inner and outer leaf, so readings can be compared rather than taken in isolation.
- External fabric checks — pointing, render condition, gutters, and downpipes, since a leaking gutter can mimic insulation failure for years.
- Wall-tie condition checks, because corroded ties are a structural issue independent of the insulation and often surface in the same inspection.
Independent borescope inspection and moisture profiling are the recommended first steps before any remedial work is agreed, and for retrofit projects a PAS 2035 retrofit assessment sets out how the whole property, not just the cavity, should be evaluated. Look for surveyors operating independently of any installer, holding relevant professional accreditation, and working to TrustMark scheme standards where the property falls within scheme scope.
Outcomes generally sort into three buckets: no action needed, partial extraction with localised repair, or full extraction followed by drying and a possible refill.
Pro Tip: Ask whether the surveyor sells extraction or installation services themselves. An inspector with nothing to gain from recommending removal gives you a cleaner read on what the cavity actually needs.
What remedial works come before any reinstall?
Refilling a cavity before fixing what let moisture in is how failures repeat within a few years. Sequencing matters more than most homeowners expect.
Priority repairs typically include:
- Clearing and repairing blocked or leaking gutters and downpipes
- Repointing failed mortar joints on exposed elevations
- Repairing or renewing cracked render
- Replacing corroded wall ties identified during the survey
Extraction becomes necessary when the borescope and moisture readings show wet, slumped, or bridging insulation rather than a sound fill with an external cause. Specialist extraction uses drilled access holes and high-powered vacuum equipment to draw material out without damaging the leaves, a process best carried out by a trained specialist rather than attempted as a DIY cavity insulation project.
Drying time afterwards varies with wall exposure, material retained moisture, and ventilation, and can run from several weeks to a few months in cold or damp seasons. Refilling too early simply reintroduces moisture into a cavity that hasn’t finished shedding it.
Which materials suit a reinstall, and when
Cavity wall insulation benefits, better thermal performance and lower heating demand, only materialise if the material fits the exposure zone and the cavity itself is sound. Installers inject material through drilled holes once a suitability survey confirms the cavity is fit for fill, and the three common options behave differently once weather gets involved:
- Polystyrene beads — free flowing, tolerant of slightly irregular cavities, generally coping well in moderate exposure.
- Mineral wool or fibrous fill — good thermal performance but can hold moisture longer if driven rain reaches it repeatedly.
- Bonded (blown) foam — sets in place, useful where cavity width is inconsistent, though extraction later is more involved if it ever fails.
In high-exposure locations, partial fill, a head seal at exposed junctions, or external wall insulation instead of a straight refill can be the safer call. Removing intact, functioning insulation purely to switch to external wall insulation can create thermal bypass risk, so industry guidance reserves removal for cavities that are genuinely defective or saturated.
Whatever material is chosen, the cavity needs a minimum width for reliable injection, must be free of debris left from the original install, and the installer must follow correct hole spacing, not a rushed grid, to ensure even coverage.
How do you choose a contractor for the reinstall?
The right contractor for cavity wall insulation replacement is one who welcomes independent scrutiny rather than resisting it. Vetting a builder or insulation firm the same way you’d vet any building contractor before signing anything saves considerably more than it costs.
- Check credentials: TrustMark registration, PAS 2035 competence where the project falls under retrofit rules, and an insurance-backed guarantee, CIGA where applicable.
- Request documents: the independent inspection report, a Unique Measure Reference or guarantee paperwork, a written method statement covering extraction and refill, and a proposed clearance certificate.
- Watch for red flags: refusal to accept an independent survey, no written guarantee offered, or aggressive compensation promises from a claims company that turned up unannounced.
Pro Tip: If a firm quotes for extraction and refill before anyone has looked inside the cavity with a borescope, treat that as a warning sign, not a convenience.
How do you know the reinstall was done correctly?
Completion of work is not the same as evidence of success. A competent job leaves a paper trail you can check against what was promised.
- A clearance certificate confirming the cavity was properly extracted, dried, and refilled.
- Repeat borescope images and moisture re-profiling, compared against the original survey readings.
- A photographic record of the external repairs, gutters, render, pointing, carried out before refill.
- Guarantee paperwork: a CIGA or equivalent insurance-backed guarantee, plus PAS 2030/2035 compliance statements and any TrustMark audit notes.
Keep an eye on the property for at least one full heating season afterwards, noting any return of cold spots or damp patches, and request a reinspection promptly if anything reappears rather than waiting to see if it settles.
OSCAR Onsite’s practical perspective on reinstalls
The single biggest risk in this sector isn’t bad material, it’s sequencing done backwards: refill before drying, extraction before diagnosis, guarantee paperwork issued before anyone checked the cavity was actually fit to fill. OSCAR Onsite’s accreditation and NVQ training exist because independent verification, done properly, catches that before it becomes a repeat failure. Do not order extraction or refilling on symptoms alone; ask for borescope and moisture evidence first, and use accredited contractors who can produce a clearance certificate afterwards.
— Alan
How OSCAR Onsite can help you get this right
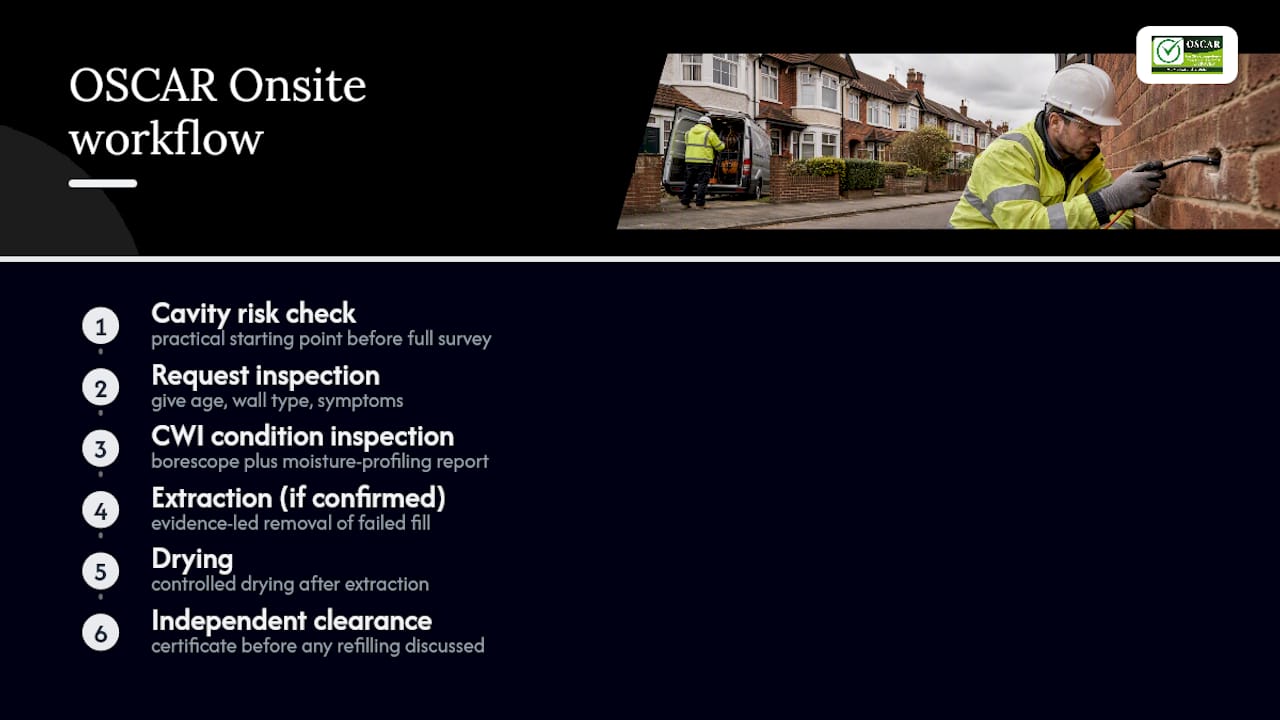
OSCAR Onsite is the independent route to the evidence a reinstall decision actually needs, not a sales pitch dressed up as a survey. Where a contractor quoting for work has an obvious interest in recommending it, OSCAR Onsite’s CWI condition inspection survey exists to give you a borescope and moisture-profiling report with nothing riding on the outcome.

If the survey confirms wet, slumped, or bridging fill, OSCAR Onsite’s cavity wall insulation extraction service follows the same evidence-led sequence: extraction, drying, and an independent clearance certificate before anyone talks about refilling. Unsure whether your property is even a candidate for reinstall? The cavity wall insulation risk check is a practical starting point if you’re not ready to commit to a full survey yet.
To request an inspection, contact OSCAR Onsite with your property’s age, wall construction, and the symptoms you’ve noticed, and expect a written report covering cavity condition, moisture readings, and a clear recommendation before any remedial quote is discussed.
Where to check official guidance
For scheme-funded installations, Gov outlines Ofgem, GBIS, and ECO4 remediation routes, while CIGA and TrustMark maintain installer registers and guarantee records.
Sources
- Gov
- Cavity wall insulation – Energy Saving Trust
- Cavity wall insulation problems, signs of failure and how to fix it | Property Passport UK
- Cavity Wall Insulation Problems: 2026 UK Guide
FAQ
Can you reinstall cavity insulation after extraction?
Yes, but only once the cavity has dried fully and an inspection confirms it’s structurally sound and free of debris. Refilling a still-damp cavity risks reintroducing the same failure.
How much does extraction and reinstalling cavity insulation cost?
Extraction alone typically runs around £1,000 to £4,000, while extraction combined with refill and associated repairs can range from roughly £2,500 to £6,000 depending on property size and the extent of external repairs needed.
Who pays for remediation if the original installation failed?
If your insulation was installed under scheme funding, remediation ordered through an official audit process is generally provided at no cost to you, though private installations depend on the original guarantee provider.
Is DIY cavity insulation installation a realistic option?
Extraction and reinstalling both require specialist vacuum equipment, drilling technique, and moisture testing, so DIY cavity insulation installation is not a practical route for reinstalling; the injection process itself needs professional survey and equipment.
How long should you monitor a property after reinstalling insulation?
Watch the property through at least one full heating season, checking for returning cold spots or damp, and request reinspection promptly if either reappears rather than waiting for the problem to worsen.
Recommended
- Site audit PAS 2030 insulation checks: what installers must prove
- Wet cavity insulation removal: when to extract and who to call
- Check UK Cavity Wall Installer Accreditation and When to Order a Survey
- Cavity insulation condition inspection survey
Our articles are a mix of human and automated generation, and sometimes mistakes or errors appear.
If you do spot any errors please do let us know via email to: office@oscar-onsite.co.uk