
TL;DR:
- Recurring cold spots on internal walls indicate thermal weaknesses or wet insulation that can lead to condensation and mould. Proper diagnosis through independent surveys and moisture testing is essential before any extraction or insulation work to prevent further damage and health risks.
A recurring cold spot on an internal wall usually means one of two things: a localised thermal weakness (a thermal bridge) where heat escapes faster than the surrounding wall, or wet and failed cavity wall insulation that is both conducting heat outward and holding moisture against the surface. Either way, when that surface temperature drops below the room’s dew point, moisture in the air condenses there first. That is how a cold patch quietly becomes a damp patch, and eventually a mould problem.
What to do right now:
- Check the spot for condensation or visible mould, especially first thing in the morning.
- Move any furniture that sits flush against the outside wall to restore airflow.
- Switch on extractor fans when cooking or bathing, and keep trickle vents open.
- Note when and where the spot appears and whether it links to rain, cooking, or showering.
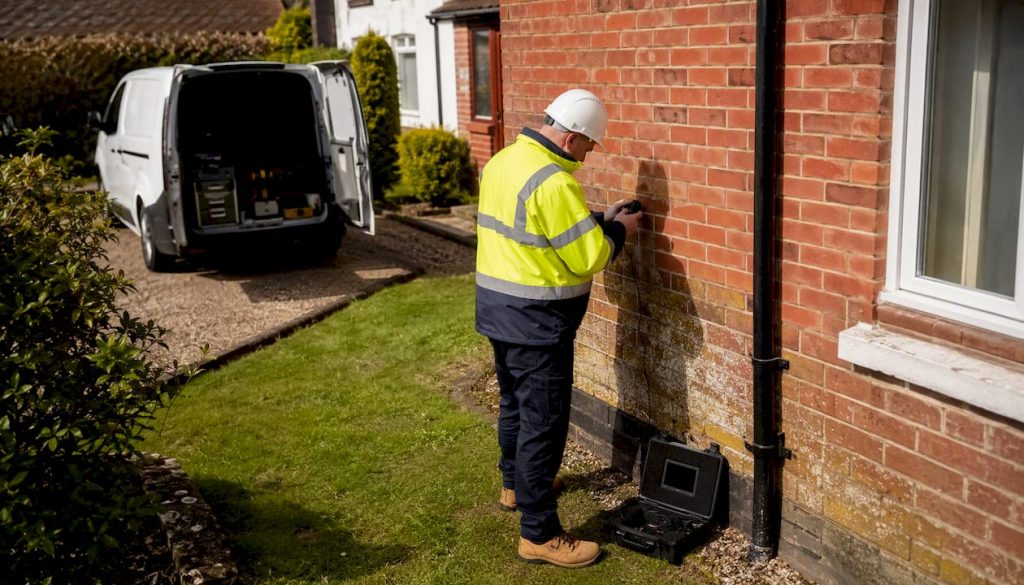
When to book a professional survey: if the cold patch reappears consistently, stays damp after the heating has been on, shows visible mould or tide marks, or if plaster is crumbling or stained, book an independent CWI Condition Inspection Survey before any extraction work is considered. Many cold spots are fixable, but none should be ignored. Left untreated, they drive up heating bills, damage plaster and timber, and create conditions that affect respiratory health.
Pro Tip: Take a photo of the cold patch at the same time each morning for a week. A spot that appears reliably at the same junction, regardless of outdoor temperature, is a stronger sign of a thermal bridge than one that only shows after heavy rain.
Table of Contents
- What exactly is a cold spot on a wall?
- What causes cold spots on internal walls?
- Why cold spots matter: condensation, damp, mould and health
- How do you find and measure cold spots?
- Practical fixes homeowners can try before calling a surveyor
- When should you get an independent CWI condition inspection?
- Indicative UK costs and timelines for surveys and remediation
- How to prevent cold spots from coming back
- Key takeaways
- Why evidence-led surveys and accreditation matter
- Suspected failed cavity insulation? Here is the OSCAR Onsite route
- Further reading and standards
What exactly is a cold spot on a wall?
A cold spot is a localised area on an internal surface whose temperature is measurably lower than the surrounding wall. The cause is not mysterious: heat moves through building materials at different rates, and anywhere the thermal resistance is interrupted, heat escapes faster. That detail, whether a lintel, a concrete floor slab, or a gap in cavity fill, becomes a cold zone on the interior face.
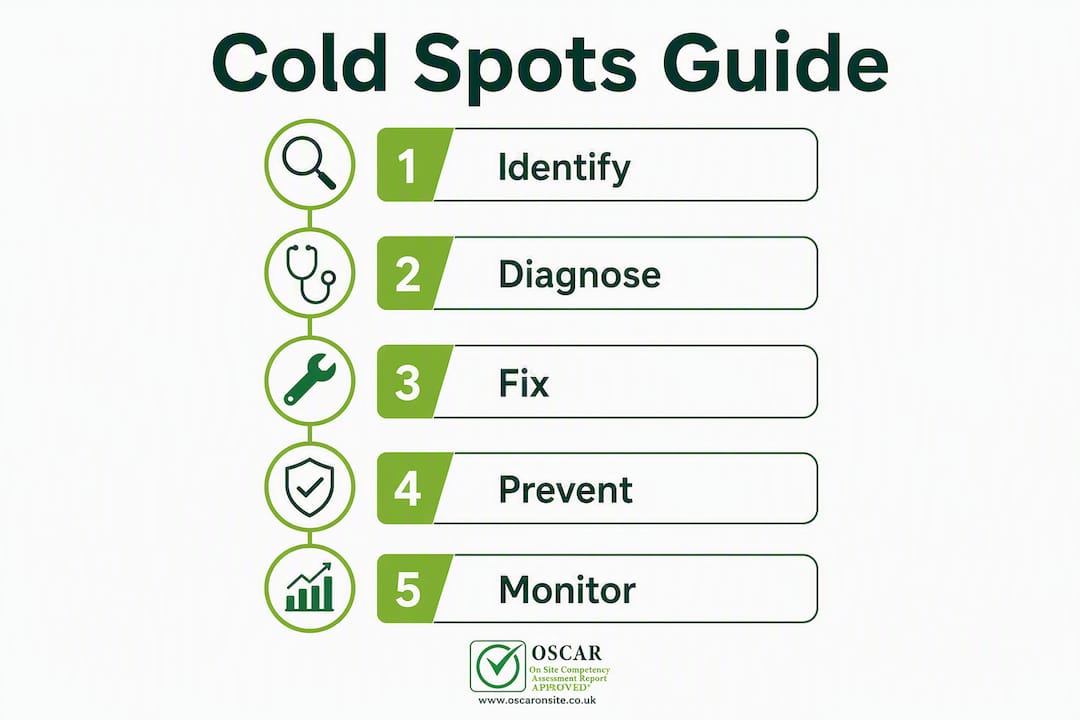
The mechanism that turns a cold zone into a visible problem is the dew point. Indoor air always carries some moisture. When that air contacts a surface cooler than its dew point temperature, the moisture condenses. A wall that is only a few degrees colder than the rest of the room can collect condensation every night, feed mould spores, and degrade plaster over months, all while the rest of the room looks and feels fine.
Three distinct patterns to recognise:
- Sharp lines or triangles at junctions (corners, window reveals, lintels): classic thermal bridge. The cold is structural, not weather-dependent.
- Broad, irregular patches that worsen after rain: more consistent with penetrating damp from failed pointing, cracked render, or blocked gutters.
- Tide marks and salt staining near skirting boards: rising damp, a different mechanism entirely, requiring different remediation.
Thermal bridges are localised weaknesses in the thermal envelope that commonly cause cold spots leading to condensation and mould when ventilation is insufficient. As homes become better insulated overall, these bridge details become proportionally more significant for both heat loss and condensation risk.
“Thermal bridges, as defined by BS EN 10211:2017, are any part of the building envelope where the typical thermal resistance is significantly altered by materials with different thermal conductivities or variations in fabric thickness, such as junctions between wall and ceiling.”
UCL — Assessing and Improving Methods of Avoiding Surface Mould and Condensation in UK Buildings
Pro Tip: Run your hand across the wall at the junction between an external wall and an internal partition. If that corner is noticeably colder than the centre of the wall, you are feeling a thermal bridge, not general room coldness.
What causes cold spots on internal walls?
Cold spots are frequently observed around windows, external walls and corners, especially in older properties with missing or degraded insulation. But the cause is rarely just one thing.
Thermal bridging at structural junctions
Lintels above windows and doors, balcony slabs that pass through the wall, steel or concrete elements, and the returns at window reveals all interrupt the insulation line. Heat flows through these denser, more conductive materials far faster than through the surrounding wall, leaving a cold stripe or triangle on the interior surface. The pattern is sharp, repeatable, and appears at the same detail every time.
Failed, saturated, or missing cavity wall insulation
Cavity fill that has slumped, partially filled the cavity, or become saturated with moisture loses most of its thermal value. A cold wall that is also clammy is a stronger indicator of moisture problems: moisture increases thermal conductivity, so even slightly damp insulation leaks heat more quickly than dry fill. Wet insulation in a cavity can also wick moisture toward the inner leaf, producing broad, persistent cold patches that do not follow structural lines.
Penetrating damp from external defects
External defects such as failed pointing, cracked render, or overflowing gutters allow water into the wall fabric and produce broader damp stains that typically worsen after rain. Unlike a thermal bridge, these patches shift position slightly and correlate with wet weather rather than with room humidity.
Rising damp
Rising damp produces tide marks and salt efflorescence (white crystalline deposits) near skirting level. It is a different mechanism from condensation and needs different treatment. If you see horizontal staining below one metre with no link to rain events or cooking, rising damp is worth investigating separately.
Internal factors that make cold spots worse
- Furniture placed tight against an outside wall blocks warm air from circulating across the surface, allowing it to cool further.
- Intermittent heating warms room air quickly but does not give dense wall mass time to warm up, so surfaces stay cold even when the room feels comfortable.
- Blocked trickle vents or absent extractor fans allow humidity to build, lowering the dew point threshold at which condensation forms.
- Hidden plumbing leaks inside a wall introduce cold, wet patches that can mimic insulation failure.
Why cold spots matter: condensation, damp, mould and health
The risk cascade is straightforward. A cold surface collects condensation. Repeated wetting feeds mould spores, which colonise plaster and paint within days under the right conditions. Over months, salts from the masonry migrate to the surface, plaster loses its bond, and the wall fabric begins to degrade. Left long enough, timber embedded in or adjacent to the wall, floor joists, window frames, and lintels, can be affected too.
The health dimension is real. Mould exposure is associated with respiratory irritation, allergic reactions, and worsened asthma symptoms. The NHS advises that damp and mould in homes should be treated promptly, particularly where children, elderly occupants, or anyone with a respiratory condition lives. If you can see black mould covering more than a small patch, or if it keeps returning within weeks of cleaning, the underlying cold spot is the problem, not the mould itself.
Energy costs follow the same logic. Moisture increases thermal conductivity, so a damp wall loses heat faster than a dry one. You end up heating the same room more to reach the same comfort level, and the wall stays cold regardless.
Signs that a cold spot has become urgent:
- Visible black or green mould that returns within two to three weeks of cleaning.
- Plaster that sounds hollow, feels soft, or shows salt staining.
- A damp patch that persists for more than a week after the heating has been running.
- Tide marks at skirting level combined with a musty smell.
If any of these apply, read the guidance on mould behind wallpaper before attempting DIY removal, and consider booking a professional survey rather than treating the surface alone.
How do you find and measure cold spots?
DIY checks you can do today
Start with a simple log. Note the time, the weather outside, and what has been happening indoors (cooking, showering, drying laundry) when the spot appears. A repeatable pattern that appears first at a junction and persists after the rest of the room has dried is the clearest on-site indicator of a thermal bridge.
Run your hand across the suspect area and compare it with the centre of the same wall. A difference you can feel clearly, not just a slight variation, is worth investigating further. Then move any furniture away from the wall and re-check after 48 hours. If the cold patch is less pronounced, restricted airflow was contributing.
Step-by-step evidence log:
- Photograph the spot at the same time each morning for seven days.
- Record indoor temperature and relative humidity using a basic hygrometer (widely available for under £15).
- Note outdoor conditions: rain, frost, or mild and dry.
- Record what activities happened in the room in the previous two hours.
- Mark the exact boundary of the cold or damp area with masking tape and photograph it.
- Compare readings on days with high indoor humidity (after cooking or bathing) versus low.
This log is genuinely useful to a surveyor. It turns a vague complaint into objective evidence.
Pro Tip: An IR (infrared) spot thermometer is an affordable tool that lets you measure surface temperature directly. Point it at the cold area and then at the centre of the same wall. A difference of more than 3°C at the same time of day is worth noting in your log.
What professional diagnostic tools reveal
| Tool | What it measures | Typical finding | Homeowner or surveyor? |
|---|---|---|---|
| IR spot thermometer | Surface temperature at a point | Temperature differential between suspect and reference area | Homeowner |
| Hygrometer | Relative humidity and dew point | Whether room conditions are conducive to condensation | Homeowner |
| Thermal imaging camera | Surface temperature across a whole wall | Reveals thermal bridges, missing insulation, and cold zones | Surveyor (hire possible) |
| Pin moisture meter | Moisture content of plaster or timber | Confirms whether a cold area is also wet | Surveyor (hire possible) |
| Non-contact moisture meter | Moisture behind a surface without drilling | Screens for damp without damage | Surveyor |
| Borescope / endoscope | Visual inspection inside the cavity | Identifies slumped fill, debris, or saturated insulation | Surveyor |
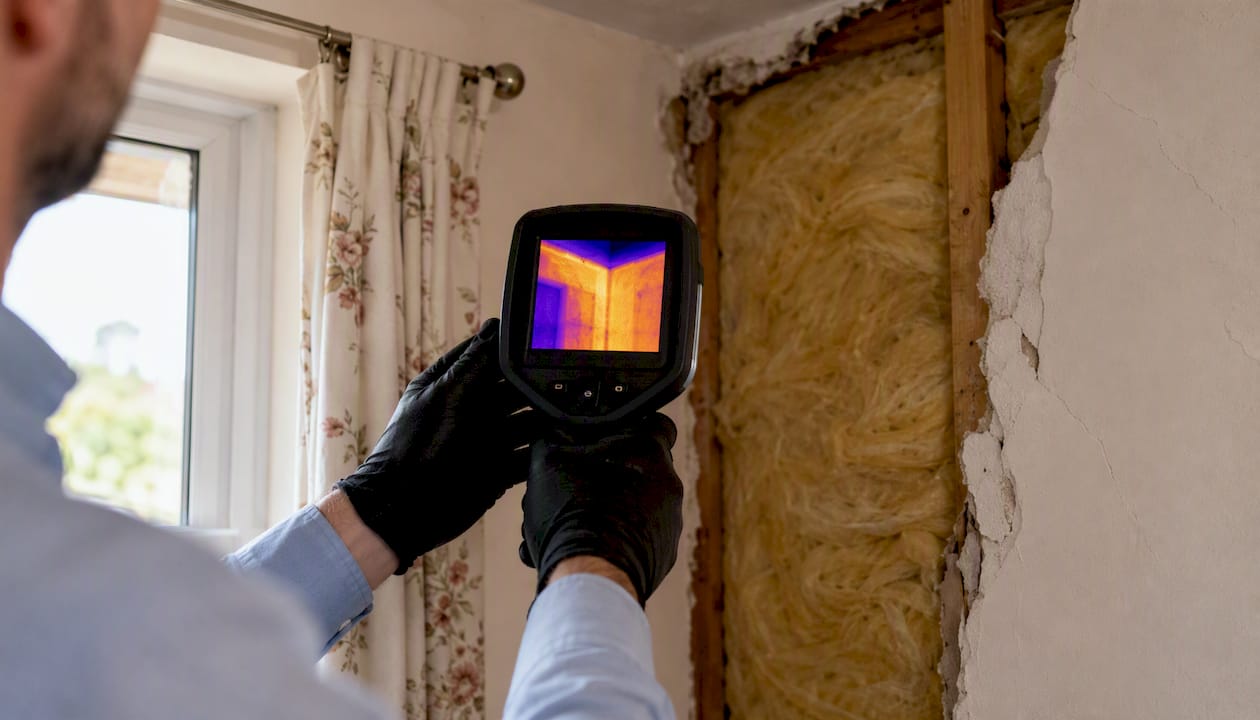
Professional surveys typically combine thermography, borescope inspection and moisture testing to identify moisture ingress and insulation failure. Thermal imaging alone can produce false positives from surface emissivity differences or transient temperature effects, which is why moisture measurement and, where needed, borescope inspection are used alongside it.
Practical fixes homeowners can try before calling a surveyor
Not every cold patch needs a professional. Some are straightforward to address with changes to how you use and maintain the property.
Short-term steps
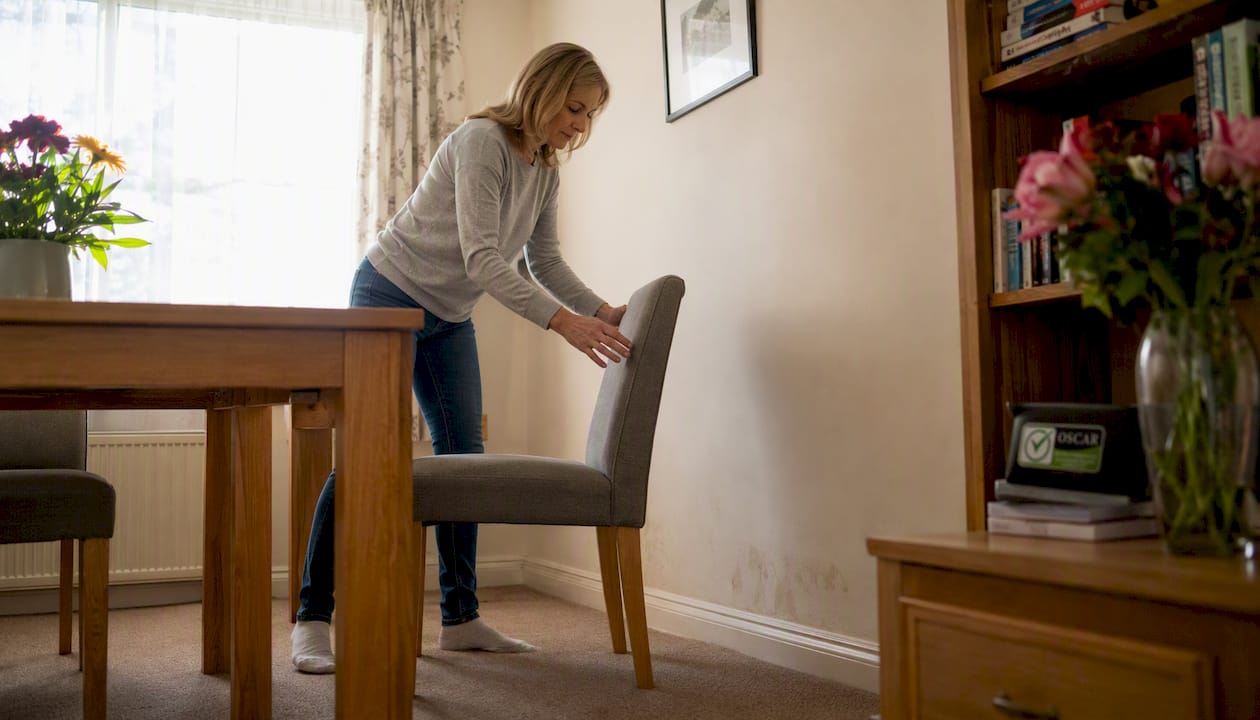
Pull furniture at least 50mm away from outside walls. Keep trickle vents open year-round, not just in summer. Run kitchen and bathroom extractor fans during and for 15 minutes after cooking or bathing. Avoid drying laundry indoors without ventilation. Keep background heating steady rather than letting the property go cold overnight and then blasting heat in the morning; wall mass takes hours to warm up, and a cold wall in a warm room is exactly the condition that produces condensation.
Medium-term measures
Repair external defects first: repoint cracked mortar, replace broken or sagging guttering, and seal any gaps around window frames externally. These are the most cost-effective fixes when penetrating damp is the cause. Secondary glazing on single-glazed windows raises the inner surface temperature significantly and reduces condensation on reveals. Draught-proofing around doors and window frames reduces cold air infiltration without sealing the property airtight.
Where a specific cold area is confirmed as a thermal bridge (not a moisture problem), targeted internal insulation using insulated plasterboard can help, but only on a dry wall. Insulating over a damp wall traps moisture and accelerates decay.
What to avoid
Solutions depend on cause, and adding insulation that traps moisture can worsen the problem. Painting over mould without fixing the cold spot will not stop it returning. Never drill into a cavity wall to inject insulation without a prior condition survey; you could be injecting into a cavity that already has failed or saturated fill.
| Action | Safe to try? | Notes |
|---|---|---|
| Move furniture away from wall | Yes | Do this first, always |
| Open trickle vents and use extractors | Yes | Low cost, immediate effect |
| Repair gutters and pointing | Yes | Addresses penetrating damp at source |
| Secondary glazing on cold reveals | Yes | Raises surface temperature on reveals |
| Insulated plasterboard on dry wall | With care | Confirm wall is dry first; seek advice |
| Paint over mould | No | Treats symptom, not cause |
| Inject cavity insulation without survey | No | Risk of worsening existing failure |
| Seal all ventilation gaps | No | Raises humidity and worsens condensation |
For mould removal, household detergent and water is appropriate for small areas (under one square metre). Biocidal mould cleaners are more effective for persistent growth but require gloves, eye protection, and good ventilation. For larger areas or mould that returns repeatedly, professional remediation is safer and more reliable than repeated DIY treatment.
When should you get an independent CWI condition inspection?
An independent CWI Condition Inspection Survey should come before any cavity insulation extraction, without exception. The reason is straightforward: extraction is invasive, costly, and not always necessary. A sales-led contractor has a financial incentive to recommend extraction. An independent surveyor does not.
A practical damp survey looks for a repeatable pattern and one clear mechanism before recommending remedial work. A robust condition inspection gives you exactly that: objective evidence of what is actually happening inside the wall, measured and photographed, before anyone commits to a course of action.
What a thorough CWI condition inspection covers:
- Exterior inspection: checking external wall condition, pointing, render, gutters, and any signs of moisture ingress.
- Internal inspection: identifying cold patches, damp staining, mould, plaster condition, and salt deposits.
- Thermal imaging: mapping surface temperature across walls to identify thermal bridges and areas of missing or degraded insulation.
- Borescope inspection: inserting a small camera through drilled inspection holes to visually assess the cavity, confirm fill presence, identify slumped or saturated insulation, debris, and wall tie condition.
- Moisture testing: pin and non-contact meters to measure moisture content in plaster, masonry, and timber.
- Dew-point and hygrothermal assessment: confirming whether surface conditions are consistent with condensation risk.
- Photographic report: a written report with measured data, photos, diagnosis, and clear remediation options.
Trust signals to ask for when booking any surveyor:
- Evidence of compliance with PAS 2030:2023 and TrustMark registration.
- Relevant British Standards referenced in the methodology (BS 8104 covers the assessment of wind-driven rain exposure, relevant to penetrating damp risk).
- NVQ-qualified surveyors with documented training.
- A sample report before you commit.
- A clear statement that the surveyor is independent of any extraction contractor.
“OSCAR Onsite recommends an independent condition survey before extraction and provides accredited member firms and clearance certification.”
OSCAR Onsite — CWI Condition Inspection Survey
OSCAR Onsite authored the UK’s Level 2 NVQ Diplomas in CWI Surveying & Inspection and CWI Extraction & Clearance, the national benchmark qualifications for the sector. Every OSCAR Onsite Accredited Member Firm is verified through audits and continuous professional development. Where extraction is confirmed as necessary following a condition inspection, OSCAR Onsite recommends using an accredited member firm and commissioning independent cavity clearance certification to confirm the cavity has been fully cleared before any reinstatement.
Pro Tip: Ask the surveyor to show you the borescope footage during or after the inspection. A reputable surveyor will have no objection. If they cannot or will not, that is worth noting.
Indicative UK costs and timelines for surveys and remediation
Costs vary considerably depending on property type, access, extent of the problem, and whether follow-up work is needed. The price ranges in the market can differ widely; always obtain written quotes following a condition inspection.
Factors that change the final cost:
- Solid wall versus cavity wall construction (solid walls cannot be extracted; they need internal or external insulation).
- Extent of contamination and whether the insulation has biodegraded or become compacted.
- Access difficulties (scaffolding, restricted elevations).
- Whether temporary heating or drying is needed before reinstatement.
- Whether a property condition report covering the wider building is required alongside the CWI survey.
OSCAR Onsite’s position is clear: never commit to extraction costs without a prior independent condition inspection. The inspection cost is modest relative to extraction; it either confirms the work is necessary or saves you from spending thousands on work that would not fix the problem.
How to prevent cold spots from coming back
Prevention is mostly maintenance and habit. Neither requires significant expenditure.
Routine maintenance tasks:
- Clear gutters every autumn and after heavy storms.
- Check and repoint external mortar every five to seven years, or after any visible cracking.
- Inspect window and door seals annually and replace if perished.
- Check that air bricks and cavity vents are clear of debris, soil, and vegetation.
Daily and seasonal habits:
- Keep background heating on a low, steady setting rather than switching it off entirely overnight.
- Run extractor fans during and after cooking and bathing.
- Keep a gap behind furniture on outside walls.
- Avoid drying laundry indoors without opening a window or running a dehumidifier.
- Open trickle vents in window frames year-round.
When to repeat a survey:
After heavy storms or prolonged wet weather, following any building work that affects the external envelope (new extension, roof work, window replacement), or if new cold patches or mould appear in a property that has previously had insulation installed or extracted.
Longer-term upgrades worth considering:
Secondary glazing on single-glazed windows makes a measurable difference to reveal temperatures. Where cavity or solid wall insulation is appropriate, a condition survey first confirms suitability and specifies the right material. External wall insulation, where it is the right solution, must be detailed correctly at junctions to avoid creating new thermal bridges at the edges.
Pro Tip: A basic hygrometer left in the most affected room gives you a running record of relative humidity. Aim to keep indoor humidity between 40% and 60%. Consistently above 65% and you are creating conditions where condensation on any cold surface becomes almost inevitable.
Key takeaways
Recurring cold spots on internal walls signal a thermal weakness or wet insulation and need proper diagnosis before any remedial work is committed to.
| Point | Details |
|---|---|
| Identify the pattern first | A cold spot at a structural junction that repeats regardless of weather is likely a thermal bridge; one that worsens after rain suggests penetrating damp. |
| Three immediate actions | Check for condensation and mould, restore airflow behind furniture, and keep a dated log of when and where the spot appears. |
| Never insulate over a damp wall | Adding insulation without confirming the wall is dry traps moisture and accelerates plaster and fabric decay. |
| Book a survey when symptoms persist | Visible mould, tide marks, plaster damage, or a patch that stays damp after heating are all triggers for an independent CWI condition inspection. |
| OSCAR Onsite’s recommended route | Book an independent CWI Condition Inspection Survey before any extraction; use an OSCAR Onsite Accredited Member Firm and independent clearance certification if extraction is confirmed. |
Why evidence-led surveys and accreditation matter
The cavity wall insulation industry has a troubled history. Millions of properties across the UK received insulation under government-backed schemes, and a significant proportion of those installations have since been found to be defective, either because the property was unsuitable, the material was wrong, or the workmanship was poor. The consequences, persistent damp, mould, structural damage, and failed reinstatement, have cost homeowners and housing providers considerably.
What I have seen repeatedly is that the problem is not just bad insulation. It is the absence of independent oversight. When the same contractor who installs insulation also certifies that the job is done correctly, there is no check on quality. When a homeowner is told extraction is necessary by a company that profits from extraction, there is no independent voice asking whether that is actually true.
OSCAR Onsite was built specifically to address that gap. We authored the UK’s Level 2 NVQ Diplomas in CWI Surveying & Inspection and CWI Extraction & Clearance, qualifications that set the National Occupational Standards for the sector. Our accredited member firms are audited against defined technical and ethical standards. Our Technical Monitoring & Clearance Certification provides independent verification that extraction has been completed correctly, before any reinstatement begins.
The principle is simple: diagnosis before treatment, independence throughout, and certification at the end. That is what protects homeowners, and it is what the retrofit sector needs more of, not less.
Suspected failed cavity insulation? Here is the OSCAR Onsite route
Cold spots that persist after ventilation improvements and external repairs have been addressed are often a sign of failed or saturated cavity wall insulation. At that point, the right move is an independent survey, not a sales call from an extraction company.

OSCAR Onsite provides independent CWI Condition Inspection Surveys using borescope, thermal imaging, and moisture testing, producing a written report with measured data, photographs, and clear remediation options. If extraction is confirmed as necessary, OSCAR Onsite Accredited Member Firms carry out the work to PAS 2030:2023 and TrustMark standards, followed by independent cavity wall insulation extraction technical monitoring and clearance certification. That certification confirms the cavity is clear before any reinstatement, protecting you from repeat failures.
To book a survey or find an accredited member firm near you, visit the OSCAR Onsite service pages or call directly. Ask for a sample report, proof of accreditation, and a clear explanation of the clearance process. Evidence-led, independent, and consumer-focused: that is the only route worth taking.
Further reading and standards
Useful resources for homeowners:
- Condensation and thermal bridges — NHBC Foundation: practical guidance on how thermal bridges cause condensation in modern and retrofitted homes.
- Cold bridging in UK homes — Sussex Damp Experts: homeowner-facing explanation of cold bridging patterns and how to spot them.
- Cold spots on internal walls — Homebuilding: overview of causes, checks, and when to seek professional help.
- How to cure cold spots and damp — DIY Doctor: practical DIY remedies and clear do’s and don’ts.
- Thermal imaging camera guidelines and interpretation — Home Energy Milton Keynes: guidance on reading thermal images and understanding what cold zones indicate.
- UCL — Assessing and Improving Methods of Avoiding Surface Mould and Condensation in UK Buildings: academic research on thermal bridges, BS EN 10211:2017, and mould risk in retrofitted buildings.
- RICS home surveys — rics.org: guidance on what to expect from a professional property survey.
Standards to check:
- PAS 2030:2023: the publicly available specification for energy efficiency measures in existing dwellings, including cavity wall insulation installation and extraction. Any contractor carrying out insulation work should be certified to this standard.
- TrustMark: the government-endorsed quality scheme for retrofit and home improvement work. Ask any surveyor or contractor for their TrustMark registration number.
- BS 8104: the British Standard for assessing exposure of walls to wind-driven rain, relevant when evaluating penetrating damp risk in cavity wall properties.
- BS EN 10211:2017: the standard defining thermal bridges in building construction, referenced in academic and professional assessments of cold spot risk.
OSCAR Onsite service pages:
- CWI Condition Inspection Survey: book an independent survey before any extraction decision.
- Cavity wall insulation extraction: accredited extraction and clearance by OSCAR Onsite member firms.
- Cavity clearance certification: independent certification that the cavity has been fully cleared.
This article provides general information for UK homeowners and does not constitute professional surveying, legal, or structural advice. Cold spot and damp diagnoses vary by property; confirm findings and remediation options with a qualified, independent surveyor before committing to any work.