
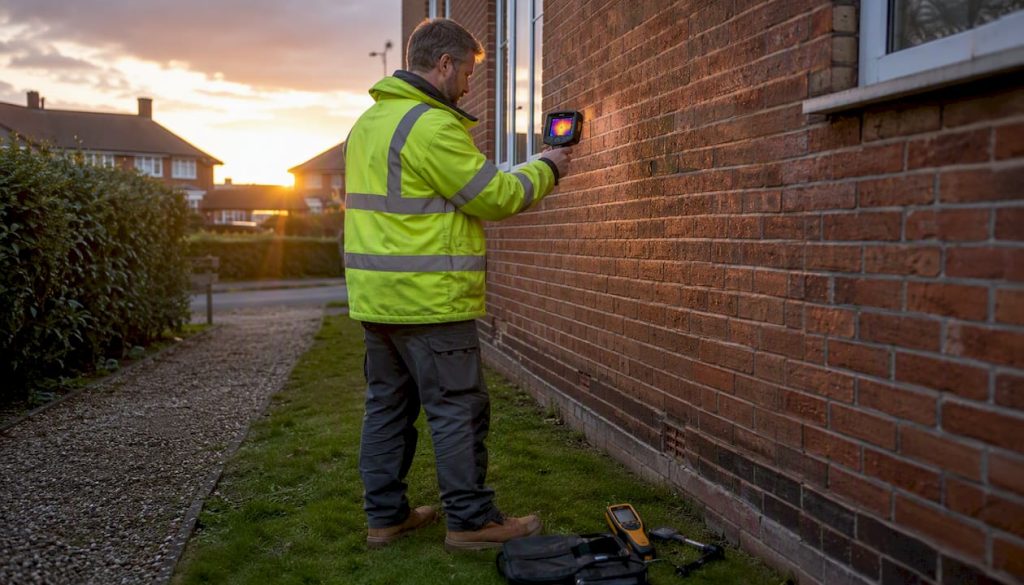
Cavity wall insulation can cause or worsen condensation, but only under specific circumstances: installation defects, a property that was never suitable for CWI, wind-driven rain penetrating the outer leaf, or pre-existing damp that was never resolved. Correctly installed CWI in a suitable home should not cause damp — the problem almost always traces back to how, where, and whether the insulation should have been installed in the first place.
If you are seeing new or worsening damp since your insulation was fitted, act on these steps now:
- Record evidence immediately. Take dated photographs of every affected area, note which walls are involved and their orientation, and log the weather conditions when symptoms appear.
- Improve ventilation. Open windows briefly each morning, use extractor fans when cooking or bathing, and avoid drying clothes indoors.
- Contact your installer. Ask for a remedial visit under the original guarantee. Keep all correspondence in writing.
- Check your guarantee. If the installation was funded under an ECO scheme, Ofgem holds guarantee information for those installs.
- Book an independent survey. Do not consent to extraction until an impartial inspection has confirmed it is necessary.
Where mould is present, treat it as a health priority. Mould spores aggravate respiratory conditions, particularly in children and older adults. Do not disturb large areas of mould without appropriate protective equipment, and seek professional treatment for anything covering more than a small patch.
Key takeaways
Cavity wall insulation causes condensation only under specific, identifiable conditions — and most problems are solvable without immediate extraction if the root cause is properly diagnosed first.
| Point | Details |
|---|---|
| CWI is not inherently the cause | Correctly installed CWI in a suitable property should not cause damp; problems arise from defects, exposure, or ventilation deficits. |
| Record evidence before acting | Dated photos, wall orientation notes, and weather logs are the evidence base for any inspection or guarantee claim. |
| Inspection before extraction | An independent borescope, thermal imaging, and moisture survey must precede any extraction decision; never accept sales-led removal. |
| Fix external defects and ventilation first | Repointing, gutter repairs, and ventilation upgrades resolve many cases without touching the insulation. |
| OSCAR Onsite for independent surveys | OSCAR Onsite’s CWI Condition Inspection Survey provides the impartial, evidence-led report homeowners need before any remediation decision. |
Table of Contents
- How cavity wall insulation can lead to condensation and damp
- Signs that suggest your CWI may be the cause
- What a proper CWI condition inspection should include
- Short-term measures to take while you arrange a survey
- Remedies: repair, waterproofing, ventilation or extraction?
- Indicative costs and timescales for UK homeowners
- Guarantees, who to contact, and how to handle claims firms
- The inspection-first principle is the one the industry keeps ignoring
- OSCAR Onsite: independent surveys and accredited clearance certification
- Sources
How cavity wall insulation can lead to condensation and damp
The physics are straightforward once you see the chain. A cavity wall works partly because the air gap between the inner and outer leaves interrupts the path moisture and cold take from outside to inside. Fill that gap with insulation and you change the thermal and moisture dynamics of the wall.
Several mechanisms can turn that change into a problem.
Wet insulation conducting moisture inward. If water enters the outer leaf through cracked render, failed pointing, or blocked flashings, it can saturate the insulation. Saturated material conducts moisture across the cavity rather than resisting it, delivering dampness directly to the inner leaf.
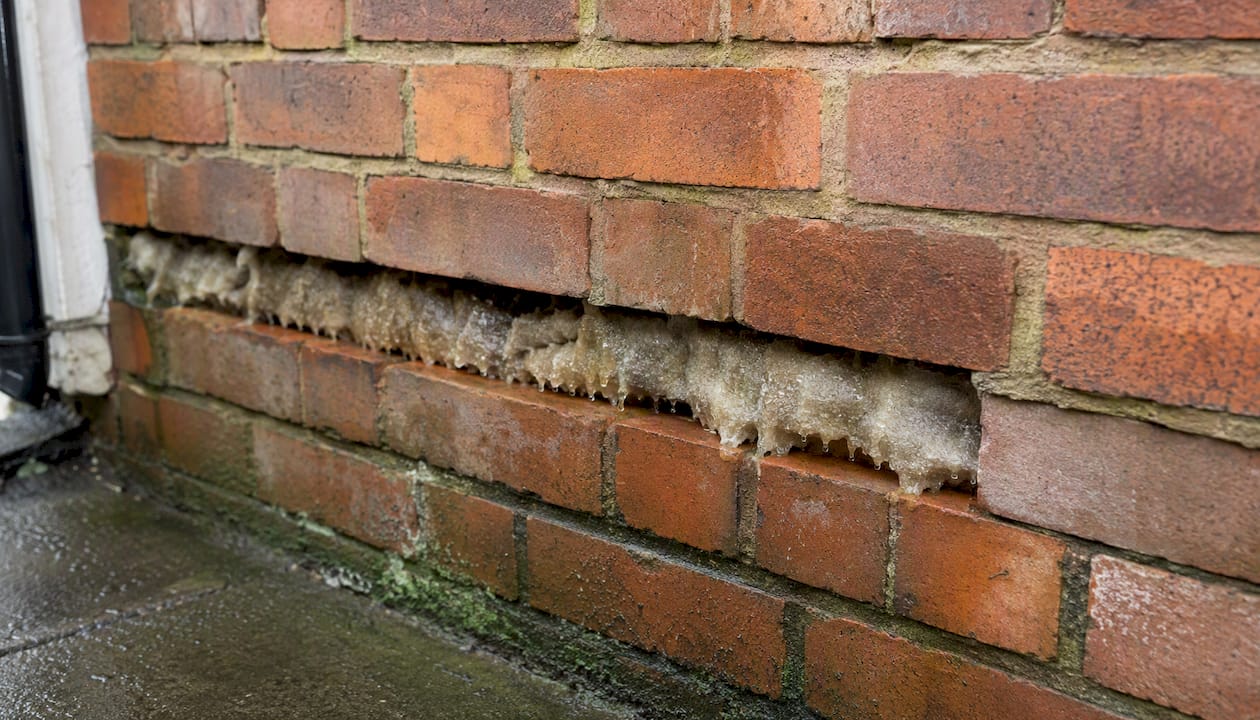
Cavity bridging. Poorly installed insulation that bridges the cavity — touching both leaves — creates a direct path for moisture and cold. Cold bridging at these points drops the internal surface temperature below the dew point, producing condensation on the wall face.
Blocked weep holes and vents. Weep holes at the base of the outer leaf allow any water that enters the cavity to drain out. When insulation debris or poor installation blocks them, water accumulates at the base of the cavity.
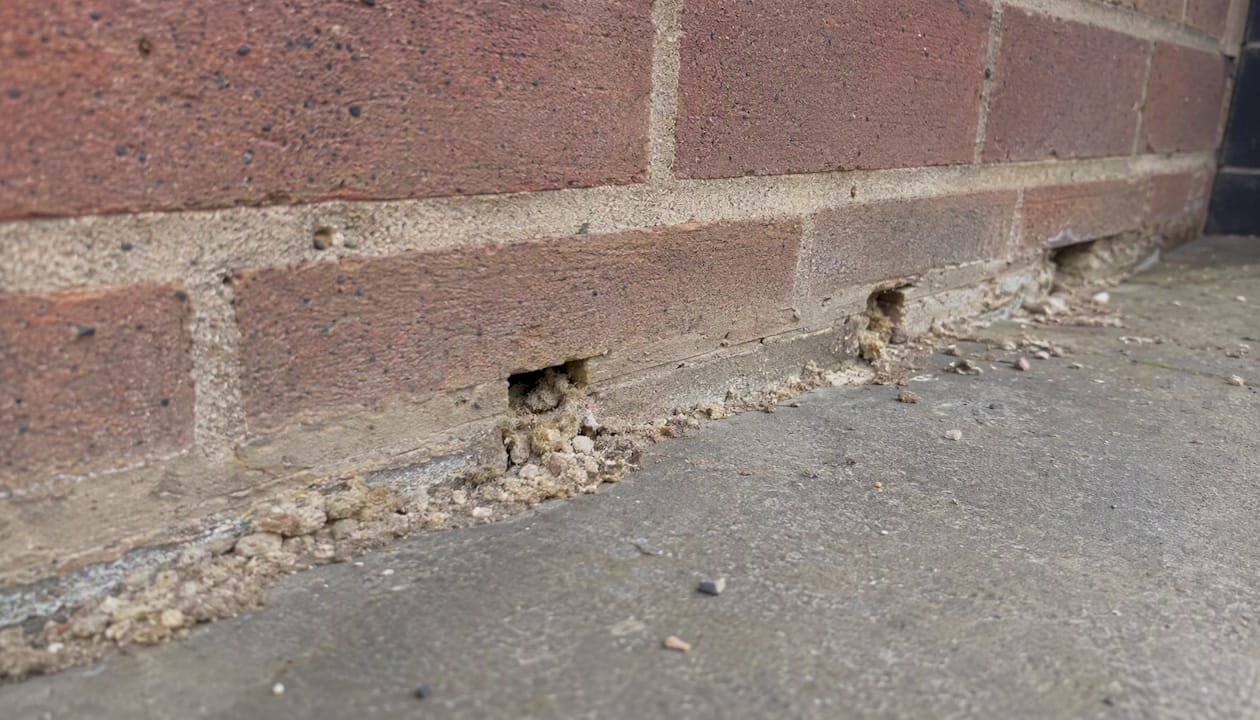
Narrow cavities and exposure zones. Properties with cavities narrower than 50 mm, or those in severe wind-driven rain exposure zones such as coastal or open hillside locations, face a higher risk of rain penetration regardless of insulation quality. BRE mapping identifies these zones, and installers are required to screen for them before proceeding.
Reduced ventilation after installation. Insulation tightens the building fabric. Without a corresponding upgrade to background ventilation, indoor humidity rises and warm moist air meets cooler internal surfaces — particularly around window reveals — producing condensation. This is frequently misidentified as structural damp when it is actually a ventilation deficit.
ABIS conditions and waterproofing treatments. UCL and BRE testing for BEIS found that waterproofing treatments can delay moisture ingress by one wetting cycle in laboratory conditions, with acrylic-treated samples showing lower relative humidity in early wetting cycles. However, performance varied with further wetting, and real-world ‘As Built, In Service’ (ABIS) defects — microcracks, failing mortar, blocked flashings — undermined results. A treatment that works in a lab can fail on a wall with a hairline crack the surveyor missed.
Signs that suggest your CWI may be the cause
Not every patch of damp on an insulated wall is the insulation’s fault. The pattern and location of the problem usually tells you a great deal.
Observable signs worth recording:
- Cold patches on internal walls that were not there before installation, particularly on exposed elevations
- Persistent mould or mildew at window reveals and on the inner face of external walls — cold spots on walls are a reliable early indicator
- Damp or peeling plaster, blistering wallpaper, or tide marks on the inner leaf of external walls
- Condensation on windows that worsens after installation, often linked to missing or blocked trickle vents
- Damp concentrated on west or south-west facing walls, which receive the highest wind-driven rain exposure in most of the UK
Diagnostic cues that point toward CWI as the cause:
- Symptoms appeared or worsened after installation, not before
- Affected walls correspond with the cavity-filled elevation rather than being spread across the property
- Thermal imaging or borescope inspection reveals wet or bridging insulation
- The property is in a known high-exposure zone or has a narrow cavity
How to tell it apart from other damp types. Rising damp typically produces a tide mark no higher than about one metre from floor level and is often accompanied by white salt deposits (efflorescence). Plumbing leaks tend to be localised, appear near pipes or fittings, and do not follow wall orientation. The Property Care Association provides practical guidance on distinguishing penetrating damp, rising damp, and condensation. CWI-related moisture tends to be diffuse, follows the insulated elevation, and worsens in cold or wet weather.
Pro Tip: Take photos on the same day each week for a month, noting the outdoor temperature and recent rainfall. A pattern that tracks wet weather on a specific elevation is strong evidence of penetrating damp linked to the insulated cavity.
What a proper CWI condition inspection should include
A thorough inspection is not a quick visual check. If a surveyor cannot tell you exactly what they found inside the cavity, with photographic evidence to back it up, the report is not worth acting on.
Core steps a qualified surveyor should carry out:
- External visual survey: checking render, pointing, flashings, weep holes, window sills and gutters for defects that could allow water ingress
- Borescope investigation: drilling small-diameter holes to insert a camera and inspect the insulation directly for saturation, bridging, debris, and wall tie condition
- Thermal imaging: conducted in appropriate conditions (a temperature differential of at least 10°C between inside and outside) to identify cold bridges and wet areas
- Moisture meter readings on the inner leaf at multiple locations
- Assessment of cavity width and exposure zone
What the report must contain:
- Dated photographs and thermal images with clear annotations
- Borescope stills or video showing the insulation condition
- A clear statement on whether the insulation is wet, bridging, or otherwise defective
- A recommendation on whether extraction is justified, with the evidence that supports it
- Details of any external defects requiring repair
Pro Tip: If extraction proceeds, insist on independent technical monitoring and a formal clearance certificate. Poorly performed extraction can leave debris, damage wall ties, and void guarantees. A clearance certificate from an independent body protects you if problems recur.
OSCAR Onsite’s CWI Condition Inspection Survey uses borescope investigation, thermal imaging, and moisture readings to produce an evidence-led report. OSCAR authored the UK’s first NVQ Level 2 qualifications in CWI Surveying and Extraction, and all member firms operate under PAS 2030:2023 and TrustMark requirements.
Short-term measures to take while you arrange a survey
These steps will not fix the underlying problem, but they reduce harm, protect your health, and preserve the evidence a surveyor will need.
Ventilation and humidity control:
- Open windows for 10–15 minutes each morning to flush out overnight moisture
- Use extractor fans every time you cook or shower, and leave them running for a few minutes after you finish
- Avoid drying clothes on radiators; use a vented tumble dryer or a condenser dehumidifier instead
- Heat the property as evenly as possible — cold rooms with no heating are where condensation concentrates
Mould safety:
- For small patches, clean with a fungicidal wash wearing gloves and a mask
- Do not attempt DIY removal of large mould areas; disturbing extensive growth releases spores and can worsen respiratory symptoms
- Seek professional treatment for any growth covering more than roughly one square metre
Evidence preservation:
- Photograph every affected area with a timestamp before any cleaning or repair
- Note room identifiers, wall orientation, and the weather conditions at the time
- Do not disturb suspected wet insulation or attempt to extract it yourself — this can worsen moisture ingress, damage wall ties, and void any existing guarantee
Remedies: repair, waterproofing, ventilation or extraction?
The right remedy depends on what the inspection actually finds. Most problems have a hierarchy, and extraction sits at the far end of it.
Repair external defects first. Failed pointing, cracked render, blocked gutters, and damaged flashings are the most common routes for water to enter the cavity. Fixing these is often sufficient where the insulation itself is not saturated. It is also the cheapest intervention by a considerable margin.
Ventilation and heating upgrades. Where condensation is the primary issue rather than penetrating damp, adding trickle vents, positive input ventilation (PIV), or upgraded extractor fans frequently resolves the problem without touching the insulation. This is particularly relevant where the installation tightened the building fabric without any ventilation upgrade.
Waterproofing treatments. The UCL/BRE research shows treatments can reduce rain penetration in laboratory tests, but their effectiveness depends heavily on the absence of ABIS defects. UKCMB’s summary of the same research notes that hygrothermal modelling and rigorous site investigation are prerequisites before treatment is applied. Waterproofing is not a shortcut around a proper survey. For homeowners in London or other urban settings considering insulation alternatives, a practical guide to building insulation types for London homes covers the options worth considering.
Extraction and clearance. Justified when an independent survey shows the insulation is saturated, bridging, or creating irreparable ABIS risk. The risks of poorly performed extraction are real: debris left in the cavity, damaged wall ties, and incomplete clearance can all create new problems. Independent technical monitoring during extraction and a formal clearance certificate afterwards are not optional extras.
Never accept sales-led extraction. A contractor who recommends extraction before seeing borescope and thermal evidence is not working in your interest. Demand the inspection evidence first, and if extraction proceeds, require an OSCAR Onsite accredited firm with independent monitoring and a clearance certificate.
Indicative costs and timescales for UK homeowners
Costs vary significantly by region, property size, and the extent of defects found. These ranges are indicative; always obtain at least three written quotes that include the inspection evidence, a health and safety plan, and clearance certification.
- Independent condition inspection: typically arranged within one to two weeks; costs vary by property size and location — check the OSCAR Onsite cost guide for current indicative figures
- Small external repairs (repointing, gutter clearance, flashing repair): usually completed within a few days to two weeks depending on access and contractor availability
- Extraction and clearance: projected timescale ranges from a few days for a small semi-detached to several weeks for a larger property with extensive remedial work; costs depend on property size, insulation type, and the extent of post-extraction repair required
- Ventilation upgrades (trickle vents, PIV unit): typically a one-day installation; costs are modest relative to extraction
Get quotes in writing, broken down by stage. Any quote that bundles inspection and extraction without separate line items should prompt further questions.
Guarantees, who to contact, and how to handle claims firms
Before spending anything on remediation, establish whether you already have recourse.
Step-by-step consumer checklist:
- Locate your original installation paperwork and any guarantee certificate. Check whether the installation was funded under an ECO scheme.
- Contact the original installer in writing, describing the problem and requesting a remedial visit under the guarantee.
- If the installer is unresponsive or no longer trading, contact the guarantee provider directly. For ECO-funded installs, Ofgem maintains guarantee information and complaint routes.
- Keep copies of all correspondence, inspection reports, and photographs. This documentation is your evidence if a formal complaint or legal claim follows.
- If the guarantee provider is also unresponsive, the government consumer guide sets out further escalation routes.
Handling claims management companies. If you receive unsolicited calls or letters from firms offering to pursue a claim on your behalf, verify the company before engaging. Check their FCA registration, ask for a written breakdown of fees, and be wary of any firm that requests upfront payment or pressures you to sign quickly. A solicitor specialising in property disputes can advise on whether a formal claim is warranted and on what terms.
Documentation to keep permanently: installation paperwork, guarantee certificates, all inspection reports, photographs with timestamps, and every piece of written correspondence with installers, guarantee providers, and any claims firm.
The inspection-first principle is the one the industry keeps ignoring
The conventional advice on CWI and condensation tends to split into two unhelpful camps: either “it’s definitely the insulation, get it out” or “it’s just condensation, open a window.” Both miss the point.
The real problem is that extraction is frequently sold before anyone has looked inside the cavity. A borescope investigation takes an hour. A thermal survey in the right conditions takes a morning. Together they tell you whether the insulation is wet, bridging, or perfectly intact. Without that evidence, extraction is a guess — an expensive, irreversible guess that can damage wall ties and void guarantees.
What the UCL/BRE research actually demonstrates is that the gap between laboratory performance and real-world outcomes is driven almost entirely by ABIS defects: the hairline crack, the blocked weep hole, the flashing that was never properly sealed. Fix those defects and many properties with CWI-related moisture problems stabilise without extraction. That finding gets very little attention from contractors whose revenue depends on removal.
The consumer protection angle matters here too. Many homeowners who report condensation after CWI are dealing with a ventilation deficit, not a failed installation. Insulation reduces air infiltration. If no one upgraded the background ventilation at the same time, indoor humidity rises and condensation follows — on windows, at reveals, on cold wall surfaces. That is a £200 PIV unit, not a £3,000 extraction job.
Get the inspection first. Demand the evidence. Then decide.
OSCAR Onsite: independent surveys and accredited clearance certification
When cavity wall insulation may be causing condensation in your home, the single most protective step you can take is an independent inspection before anyone touches the wall.

OSCAR Onsite’s CWI Condition Inspection Survey delivers exactly that: borescope investigation, thermal imaging, and moisture readings, compiled into a clear evidence-led report that tells you whether extraction is justified or whether a simpler fix will do. OSCAR authored the UK’s first NVQ Level 2 qualifications in CWI Surveying and Extraction, trains surveyors across the country, and accredits member firms to PAS 2030:2023 and TrustMark standards. Where extraction is justified, OSCAR Onsite provides independent technical monitoring and issues a formal clearance certificate once the cavity is confirmed clean. Book your independent CWI condition inspection at Oscaronsite.
Sources
- Waterproofing cavity walls to allow insulation in exposed areas: final report (UCL/BRE for BEIS)
- Cavity wall insulation (CWI): consumer guide to issues arising from installations (government consumer guidance)
- What type of wall insulation should I use and what are the issues? | Front Door